This article will delve into the details of this innovative feature, offering a step-by-step guide how to use the auto-archive feature on your Android device.
And before we start, I would like to mention that we have a bunch of useful articles about how to increase the productivity of your Androd device. For example, you can read about how to remove apps from secure folders on Android.
Understanding Auto-Archive: A Game-Changing Feature
Google’s auto-archive function has been developed to automatically reduce the storage footprint of rarely used apps by almost 60 percent, but it doesn’t remove the app or related data. This instrument is especially handy for users battling storage limits or reluctant to lose their apps forever.
How Does Auto-Archive Work?
The cool part about this auto-archive option is its unique way of marking archived apps. It places a cloud symbol over each one. No worries – these apps are still there in the app drawer and home screen. It is easy enough for users to bring them back and use whenever they want. Clicking on an archived app sets off a re-download, leading to a total restoration. This happens as long as the app is up on Google Play.
Enabling Auto-Archive: A User-Friendly Process
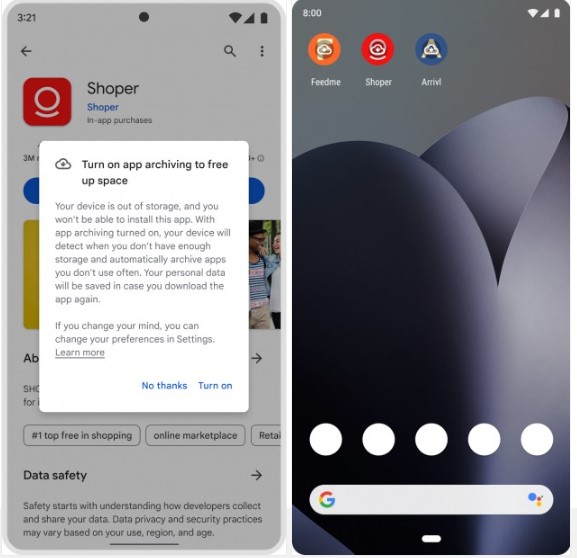
To use this space-saving feature, Android users must choose to activate the auto-archive function. A pop-up will show asking to turn on auto-archive when trying to download a new app on a device that is running low on storage. You can adjust the preferences of this feature in the settings, giving you control over your storage.
Opting In: A Necessary Step
The choice to auto-archive becomes available when trying to download an app without sufficient storage on the phone. In this case, an alert appears in the Google Play store encouraging the use of app archiving. It also mentions that you can change this setting on the device later.
And we can also recommend you an article about how to find decoy apps on Android and iOS an then offload them.
Comparison with Apple’s Offload Unused Apps Feature
A few years ago, Apple revealed their “Offload Unused Apps” tool in iOS 11. This is similar to Android’s current auto-archive feature. Both aim to help save your device’s storage by not deleting apps completely. Yet, Android’s tool is a bit unique. Why? By just clicking the app icon, you can easily download it again and continue using it.
Managing Auto Archive Preferences
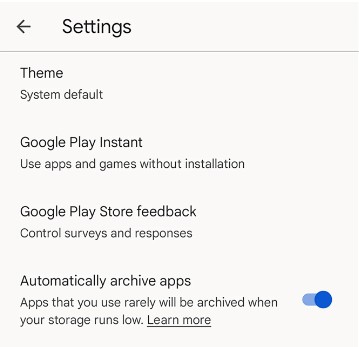
For Android folks, the Settings menu has an auto-archive option. This feature isn’t automatically on. However, you can turn it on using your phone’s Play Store app. Just click on your Google profile picture, pick Settings, then go to General. There’s a switch there to auto-archive apps. Remember, this only starts working when your phone is running low on storage.
Auto Archive vs. Manual Clearing: Exploring Options
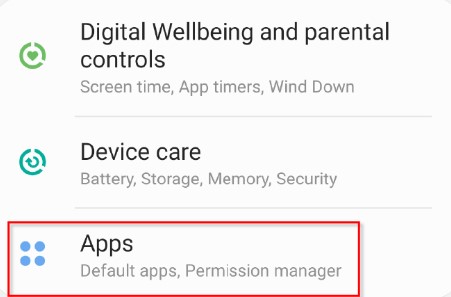
The Auto Archive function is like iOS’s offloading tool; it creates more space in the app without getting rid of it or its information. While there is no button to individually archive apps, users can manually delete an app’s data, though. In the Settings menu, under Apps, you’ll find the app. Tap on it, then tap on Storage and cache, and finally, tap on Clear storage. You can use this manual method to pick and choose which app data to delete. You might come across messages, emails, or synced playlists that have been stored on your device.
Streamlining Storage Management with Auto Archive
To sum up, Google’s Auto Archive feature for Android is handy for those wanting a swift solution to clear up storage room without giving up on using their apps. If you go through the steps in this guide, Android fans can smoothly switch on and look after the save-for-later feature. This leads to a tidy and improved mobile phone experience. Taking on these creative storage cleaner tools guarantees your device keeps running at its peak, even when app use and storage needs are on the rise.
Alternative options
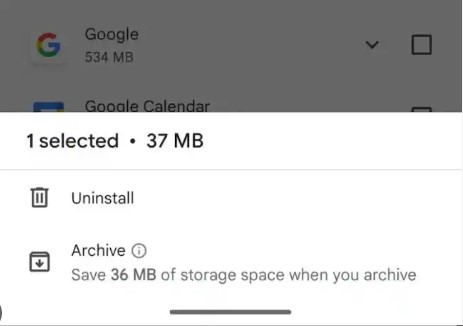
If you’re constantly receiving notifications about low storage space on your Android device, it’s time to take action. You might not be satisfied with the Auto Archive function. Remember that a more standard and obvious, but more effective way to free up valuable storage is by deleting unused apps from your device. Not only will this help reclaim precious space, but it can also improve the overall performance of your Android device.
Assess Your App Usage
Begin by evaluating which apps you regularly use and those that have been sitting idle on your device. Many times, we accumulate numerous applications over time that we rarely open or haven’t used in months. You may find games you no longer play or utility apps that are now redundant due to built-in features offered by newer versions of the operating system.
Check Storage Usage
1. Open Settings on your Android device.
Android provides a built-in feature that allows you to see how much storage each app occupies:
2. Look for an option labelled Storage, Storage & USB, or similar (location may vary depending on the version of Android).
3. Within the storage settings, tap on Apps or App Manager.
4. You should see a list of installed applications along with their respective sizes.
Take note of large-sized apps occupying significant amounts of storage space as these will likely be prime candidates for deletion if they are not essential.
Uninstall Unused Apps
Now that you have identified which apps are consuming substantial amounts of storage without being frequently used, follow these steps to uninstall them:
1 . Return to the list of installed applications within Settings > Storage > Apps (or similar).
2 . Tap on an app name from the list—this will lead you to its specific settings page.
3 . On this page: – Click on the Uninstall button or similar option. – Confirm your intent to uninstall when prompted.
4 . Repeat this process for all unused apps you wish to remove from your device.
By the way, we also have an interesting article about how to rename apps on Andoid.
Clear App Caches
Even after uninstalling an app, residual data in the form of caches may remain. These files can accumulate over time and occupy significant storage space. To clear app caches:
1 . Go back to Settings > Storage > Apps (or similar).
2 . Tap on an app name that you have previously uninstalled or one that is still installed but taking up considerable space due to cache accumulation.
3 . Within the specific app’s settings page: – Look for an option labeled Clear Cache or something similar. – Tap on it to remove cached files associated with that particular app.
4 . Repeat this process for other apps as needed.
